Beautiful nail design with foil - it's easy!
Content:
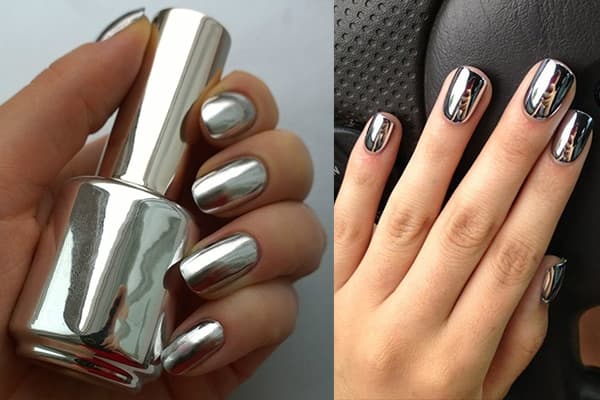
Fashion for futuristic metal nails is gaining momentum. To make such a manicure, you must definitely learn to use foil for nails. It can be of different types: sheet, translated, thermo (minx), adhesive, liquid, crushed (in bulk). Usually it is applied to a base sticky coating or special glue, and then fixed with a top. A trendy manicure is worn a little less than usual, but how impressive it looks!
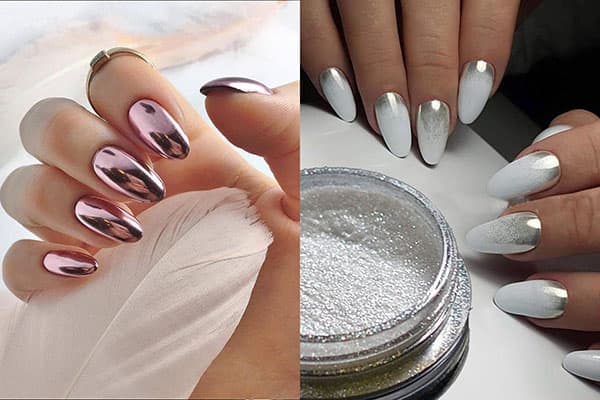
Foil for nail design
Many people associate metallic coatings with the technologies of the future, all kinds of equipment and cars. And only fashionistas know that metallic is one of the trends of the 2019–2020 season. The solution is relevant for clothing and manicure. To create a fashionable nail design, a special thin foil is used. It is applied in a special way.
Girls sometimes ask: is it possible to use food foil? Unfortunately not. It does not have the necessary flexibility, thickness and structure. For nail design you need a special foil film. Fortunately, there are many varieties of it. Everyone can find the material to their taste and wallet.
Kinds
Foil for manicure is different from the usual. It is thinner, more elastic, it is easy to use.
There are 7 main varieties of material:
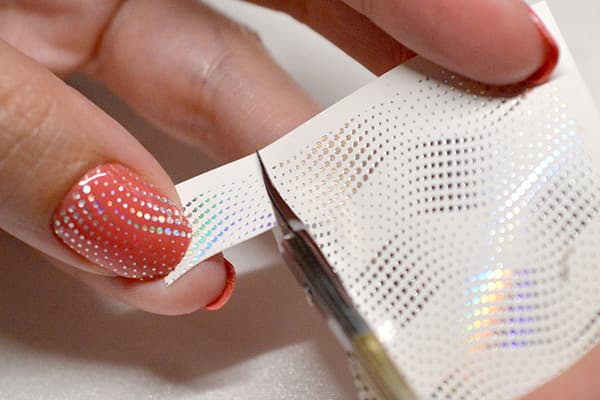
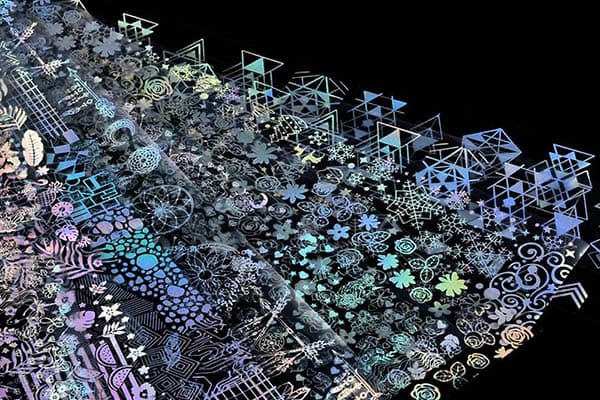
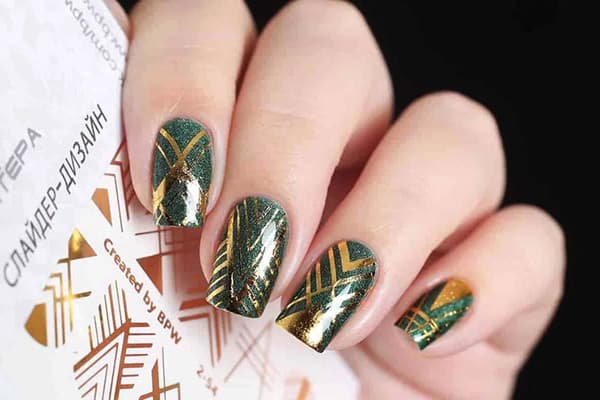
- Transferable. The most popular type of foil for nails. Often, it is sold rolled up and packaged in jars. Metal spraying is applied to the surface of a thin film. It is applied to the nail plate with a sticky coating and removed after a few seconds. Spraying remains on the nail, and the film becomes transparent. Most importantly, the design is beautiful and neat.
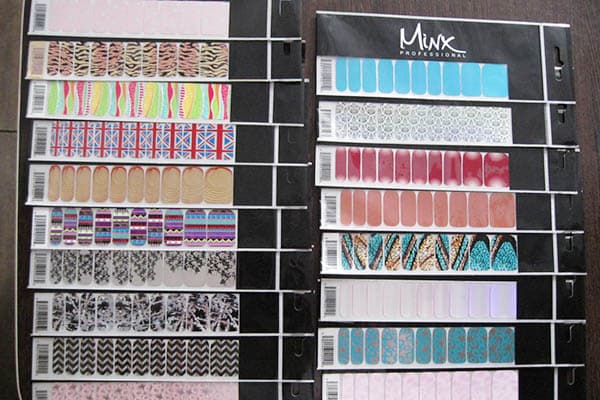
- Minx thermal stickers. Made of shrink film. The stickers are in the shape of a nail and replace the varnish. Minx is applied without glue, by heating under the lamp. The remnants of the film are cut off. To remove the minx manicure, just hold your hands in hot water for 10-15 minutes.
- Sheet foil “casting” is used to create the design, and various decorative elements are also cut out of it. Sheets do not have an adhesive backing and are attached to glue or sticky varnish.
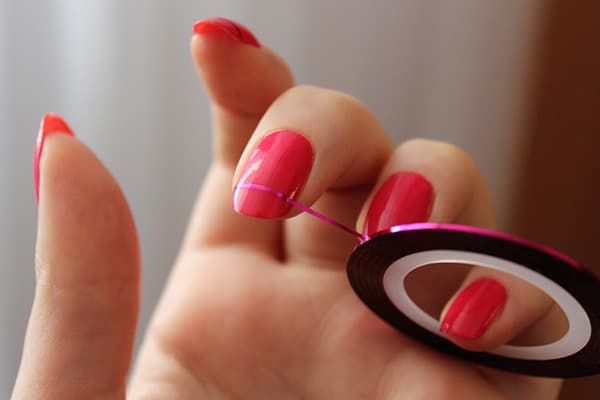
- Scotch tape most often presented in the form of foil thin strips 1-3 mm thick. They are used to create geometric designs. They have a sticky layer, and therefore are easy to use.
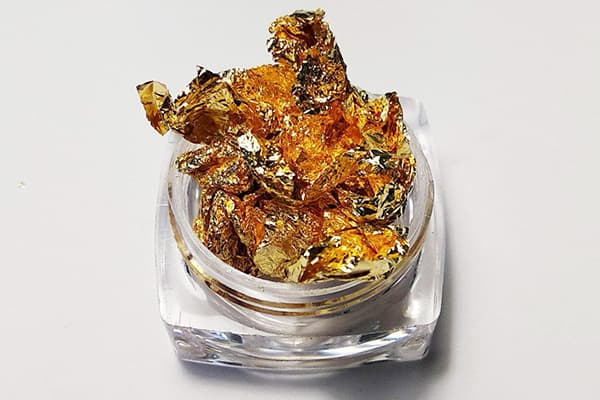
- Foil in bulk. Ultra-thin foil is laid out on glue. She is a little reaped and creates the effect of a noble metal. They make an aquarium design with her.
- Sliders are ultra-thin films that separate from the substrate after brief soaking. Often they are presented in the form of patterns, but there are foil stickers in the shape of a nail. They are sticky and easy to stick.
- Liquid foil. This is a separate type of gel polish. The shiny mixture looks very thick, but is distributed evenly and dries quickly. The term of wear of this type of “metallic” decor is the longest.
Decor Options
Foil is a universal tool for creating a festive nail design. There are many decor options:
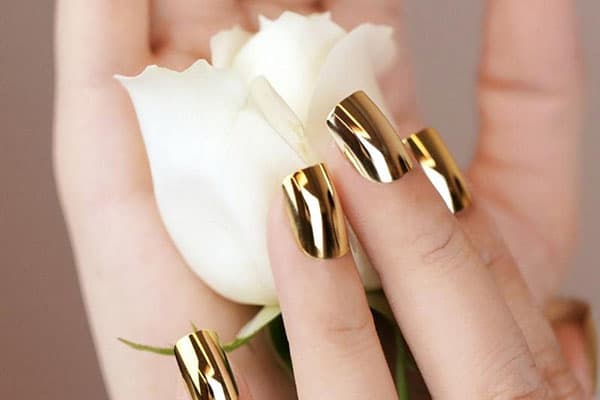
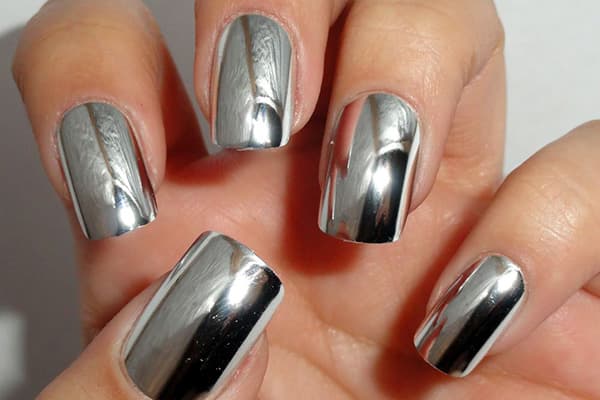
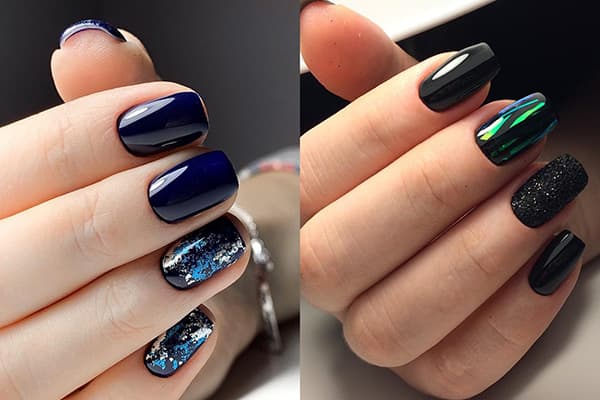
- Nail plates can be covered with a shiny film completely. Sparkling manicure is suitable for themed Egyptian or New Year's party.
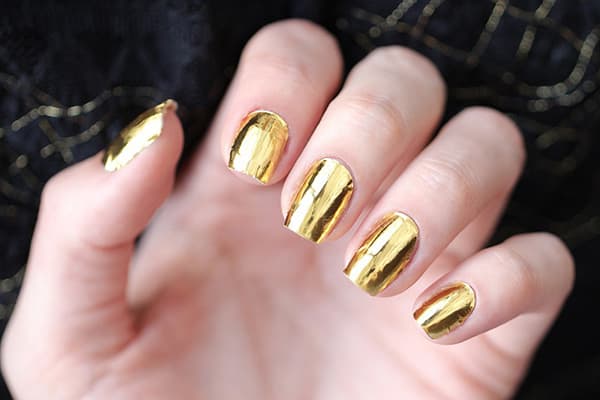
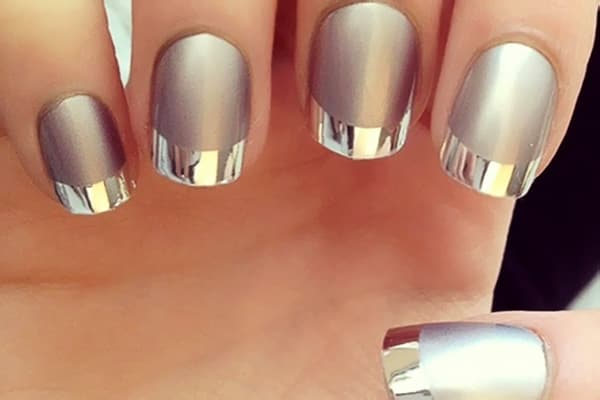
- Application of foil on 1-2 fingers. It is for such decor that demand is above all. “Metal” nails make the manicure special, eye-catching, but not dazzling.
- French and moon manicure.The classics of the genre in the original performance will appeal to creative personalities.
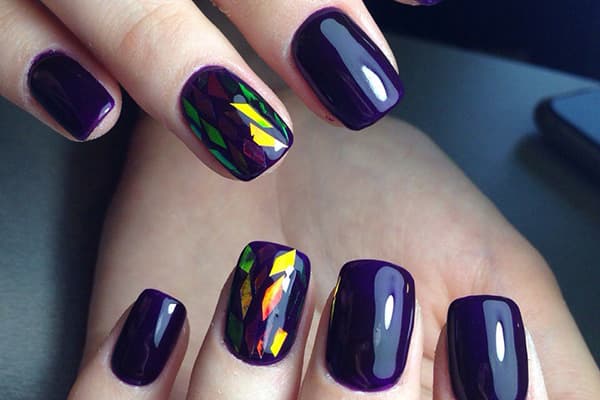
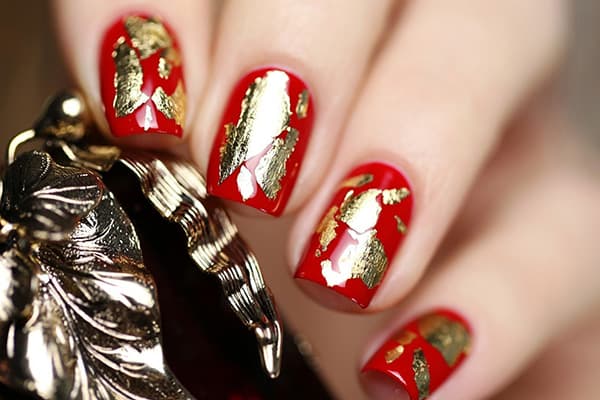
- Stained glass manicure and broken glass design are also created using foil film. It turns out spectacularly and festively.
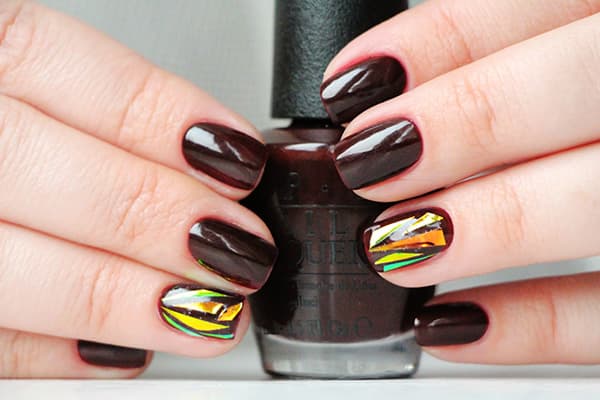
Design with metallic effect looks the most advantageous with a rounded shape of nails.
How to use foil for nails?
As a decoration element, foil for nails is very easy to use. You need to know just a few nuances:
- It is applied to the varnish coating, with the exception of minx thermal film and liquid foil.
- If there is no sticky layer on the foil film, you will need a special glue: Jina, HONGYI, Rio Profi, Global Fashion. Or you can glue it on the sticky layer of gel polish. The result is approximately the same. Each girl chooses what is more convenient for her to work with.
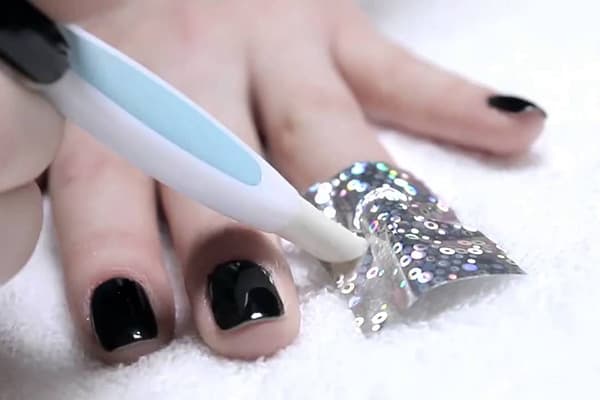
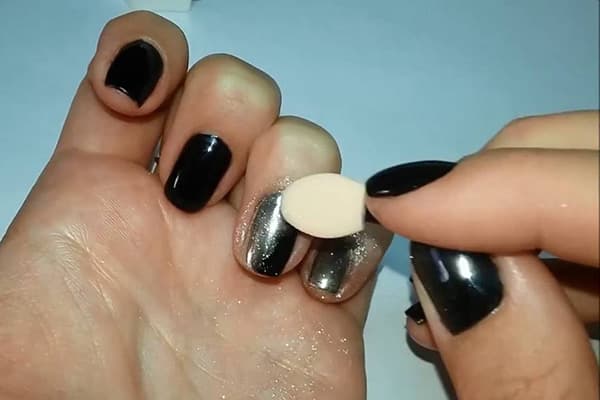
- The transfer foil must be ironed for an even print, paying particular attention to the areas on the sides and near the cuticle. For smoothing use an orange, ear stick or pusher with a rubber tip.
- Fixing to glue is carried out after it dries out a little and becomes transparent. Different firms have different drying times. 2-3 minutes wait on average.
- After applying the foil, a topcoat must be applied. Otherwise, the decor is very quickly overwritten.
A well-made "metal" design retains a presentable appearance for 14-17 days. The home version does not last so long - 3-5 days. If you want to prolong its existence, it is necessary to carry out household chores with gloves. And you can cover the nails with a fixative on the 3-4th day.
When using a transfer foil, wait a while before applying the finish layer, otherwise it may become clogged and cracked. Also, it cracks upon repeated pressing, for example, when they try to print the spraying several times. You need to work with the material carefully.
Glue fixing
Before using the glue, the nails are covered with the main color of the varnish. You need to wait until the base is completely dry. Only then the adhesive composition is applied in a thin layer on the surface of the nail plate. The foil is glued at the moment when the glue has changed its color.
How to glue the transfer foil:
- Make a manicure. Using a nail file, give each nail the desired shape.
- Polish the nail plates with a buff with an abrasive level of 300 grit.
- Use a degreaser and then apply the base.
- Place your nails under the lamp to dry the gel polish.
- Remove the adhesive layer from gel polish with a special cloth.
- Coat the primary color.
- Dry the gel polish and remove the sticky layer.
- Brush your nails with a thin layer of glue. Apply it on the entire surface or on separate sections - depending on which design is planned.
- Wait a few minutes until the glue becomes clear.
- Attach the foil with the matte side to the nail and iron it with a rubber pusher or cotton swab.
- After 15–20 seconds, quickly remove the foil.
- After 2-3 minutes, apply the topcoat.
When using sheet foil, decor elements are first harvested. To create the “broken glass” effect, the foil film is randomly cut, and then the “fragments” are laid out with tweezers on the surface of the nail, smeared with glue.
Some types of glue are dried under a lamp. For use without a lamp, HONGYI glue is suitable. He perfectly holds not only foil, but also rhinestones. Dries in 5 minutes.
Foil on gel polish without glue
If you don’t have glue on hand or don’t want to spend extra money on it, you can make a beautiful design with adhesive-based foil. It is glued to dried gel polish with a sticky layer removed. The sheet and transfer film, on the contrary, is applied to the sticky layer.
How to use the transfer foil without glue?
- Make a manicure, and then polish and degrease the nails.
- Apply base and dry.
- Cover the nails with the main color of gel polish and place under the lamp for 2 minutes.
- Apply foil to the nails immediately, without removing the sticky layer.
- Flatten the film with an orange or cotton swab.
- Remove it with a quick motion.
- After waiting 2 minutes, apply the finish.
- Dry the nails under the lamp and remove the sticky layer.
The foil always lays on special glue well. But to use it without glue you need to get used to it. It can be badly printed, fall away. Dense and textured layers are not glued to gel polish.
Fixing to regular varnish
To make a manicure with foil, it is not necessary to have a lamp - you can also glue it on ordinary varnish. Sliders, adhesive tapes are torn off the protective layer, glued to already dried nails and immediately covered with a fixative. It is possible to use a transfer foil, but it must be borne in mind that it is difficult to print the whole picture on ordinary varnish. But chaotic prints and patterns are obtained quite well.
How to use transfer foil?
- Make a manicure.
- Polish the nail plate and degrease.
- Apply nail polish and wait for it to harden, but still stick.
- Apply foil with a matte side to the varnish, straighten.
- Remove it by movement from the nail bed.
- After 5-10 minutes, cover the nails with 1-2 layers of transparent fixative.
Experts advise choosing the type of foil with "gasoline" stains for home application. It is translucent, shimmers with different colors, and thanks to this, defects are not striking.
Can the foil be replaced?
Mirror and metal manicure is usually performed using foil film. But if the material cannot be obtained for some reason, you can resort to other methods.
As an alternative, apply:
- glitter - pieces of foil ranging in size from 0.1 to 1 mm;
- glitter varnish;
- liquid or dry mica;
- mirrored.
Foil ennobles any design of manicure. She gives it shine and originality. Nails with metal inserts look well-groomed and expensive, despite the low cost of the material and ease of application. The main thing is to observe accuracy in work, and the rest is a matter of technology.