How can I manually sew a patch on jeans or elbows?
Content:
If the holes on the seams of the products can be easily stitched using a machine or processed by hand, it is better to sew a neat patch onto the surface of the damaged fabric. It can be almost imperceptible or, conversely, catch the eye. Today, even blanks do not have to be done on their own.
Profile stores offer a variety of flap options that will adorn the elbows, knees, or any other affected part of the item. Even jeans torn between the legs at the seam can be restored if desired, spending only a few minutes of their time on this.
Types of patches, rules for their implementation
First of all, you need to understand what patches are, how they differ, what their advantages and disadvantages are. Functional elements with decorative properties are conventionally divided into three groups:
- Bilateral. It is most often used to repair jeans, a sleeve torn on an elbow, and worn knees. It consists of two parts of the same shape, but slightly different in size. At the first stage, the smaller element is sewn to the problem area from the wrong side with any seam. On the second, a large-sized part is superimposed from the face, it should completely cover the marks from the seam of the base patch. In this case, you can use only a blind seam, done by hand, even a neat machine line will be striking.
- Set-in. A decorative option that can take on any shape. With it, you can decorate not only such problem areas as a sleeve or knee, but also areas on the front of the product. Some creators even use such elements to restore the zone on the trousers between their legs. If you additionally apply several similar applications to the legs, it looks very original.
- Waybill. The simplest, but not the most reliable form. If everything is done correctly, the element will be almost invisible, but its service life is not happy. You just need to take a suitable flap and sew it to the surface of the fabric from the front with a blind seam.
Tip: If in the process, rags are used that are different in texture from the base, then it is better to pre-wet and sew them in a slightly damp form. This will prevent the deformation of the patch after washing the product.
After completion of the work, the updated area must be ironed and, if possible, steamed. Thick jeans and trousers are recommended to be washed immediately to make sure that the fabric is laid down as needed and there is no wrinkling of the area. When selecting flaps, it is necessary to be based not only on the decorative and functional properties of the fabric, but also correctly compare the texture of the material with the base. Thick leather or velvet patches on light fabric will look inappropriate.
How to sew a patch on jeans between the legs?
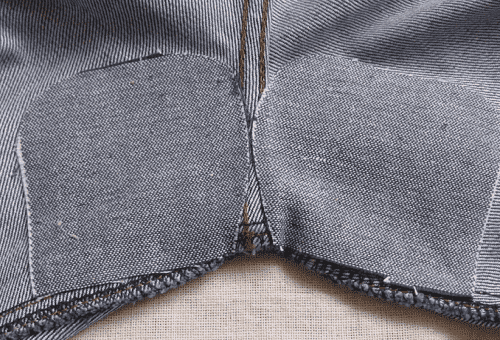
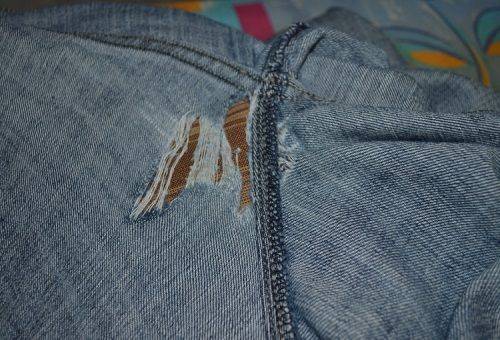
When worn regularly, trousers wear out quickly between the legs due to constant friction. Most often, jeans made from natural fabric suffer from this. For the recovery procedure, it is better for beginners not to experiment with various materials and simply take rags of matter that could remain after shortening the legs. Sewing elements can also be done manually, but only if the needle skills are at a high level.
The event itself is as follows:
- First, jeans need to be washed, dried and ironed.We do the same with patches of fabric, of which we will cut patches.
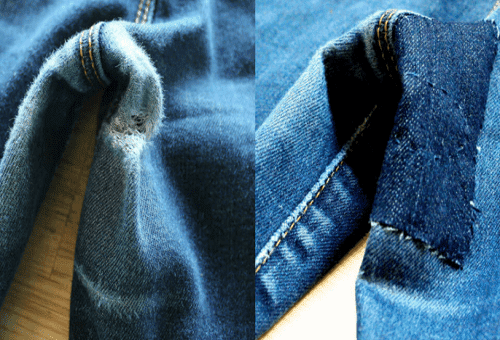
- Work with the area between the legs should be mirrored, even if only one side is damaged. To do this, we disassemble the connecting seams, iron the fabric, remove excess threads. We mark with chalk lines on which we will cut the material, leaving room for seams.
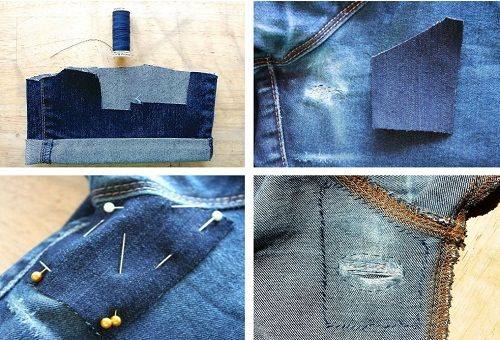
- We cut out from the patch material, be sure to leave allowances for the seams. In the process of creating patterns, you need to use the mirror principle, otherwise one of the legs may skew.
- Next, sew patches on the jeans using the connecting seam. The threads should correspond to those that were used when sewing the product. In the absence of appropriate skills, it is better to do with a machine line (zigzag or overlock).
After the manipulation, you need to make sure that the length of the legs does not suffer, and there are no uncomfortable sensations in the area between the legs.
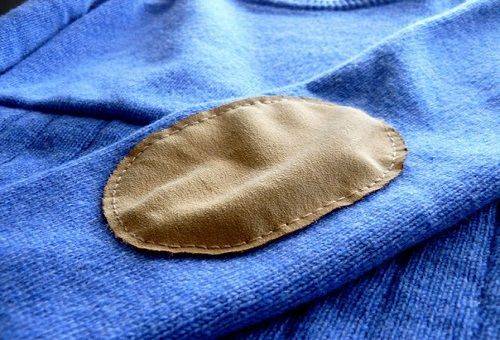
Elbow patches - how to sew to look neat?
To restore the sleeve in the elbow, you can use any of the following types of patches. If you want to not only repair a thing, but also give it a unique appearance, then you should try the option using a kind of woolen heel. Best of all, such a move will look on a tight or light sweater, sweatshirt.
The manipulation looks as follows:
- We are preparing everything you need. In addition to the sweater, we need a dense rectangular sponge, a shape (profile or confectionery), colored wool, felting needles and scotch tape.
- We put on a sweater, bend our arms at the elbows and glue pieces of tape at a distance of 2-3 cm from the fold. Thanks to the tags, everything will be done smoothly.
- After that, we pull the sleeve onto the sponge, apply the form, focusing on the adhesive tape with the lower edge and spread the form with wool.
- Then we roll the wool in the traditional way, piercing it with a needle located at a right angle. We act until the fluffy hair turns into a dense layer.
- We remove the form and fix the work by steaming with an iron. Thus, one sleeve can also be decorated, but the product will look more harmonious with two similar patches.
If initially everything was done correctly, patches will not require special care. They will last for so long, preserving the original neat appearance.